cross ad

Showing posts with label tips and tricks. Show all posts

Friday, 1 December 2017

How To Encrypt and Hide Photos, Videos and Files on Android

How To Encrypt and Hide Photos, Videos and Files on Android


Would you be willing to let another person browse your photo or video gallery? As digital data becomes more accessible and easy to carry, there’s an increasing demand for privacy. Sure, there are certain smartphone apps that allow you to lock and hide your personal data. But are they truly secure?
When you search the Google Play Store, you’ll find several “vault” apps that offer to keep photos, videos and other media files protected with a passcode (or pattern lock, fingerprint, etc.). We explored several of these apps, to find out whether they really secure the data with encryption or not.
In our tests, we imported photos and videos into different vault apps, and tried to recover them externally without unlocking them. Turns out, many of these apps do not actually encrypt the file, leaving them vulnerable, and easily recoverable without the passcode.
For instance, AppLock from DoMobile is one of the most popular app lockers on Google Play, but its app-lock screen can be bypassed in several ways, based on its on-device implementation.
Additionally, the Vault feature of the app is intended to hide your private photos and videos on your Android device. But as it doesn’t implement encryption, these hidden files could be recovered quite easily, by browsing the device storage using a regular file manager app.
On the other hand, a few security apps, such as Vault from NQ Mobile Security, claim to encrypt your data with passcode. But studies have shown that the popular vault app is quite easily crackable as it doesn’t implement a standard encryption algorithm.
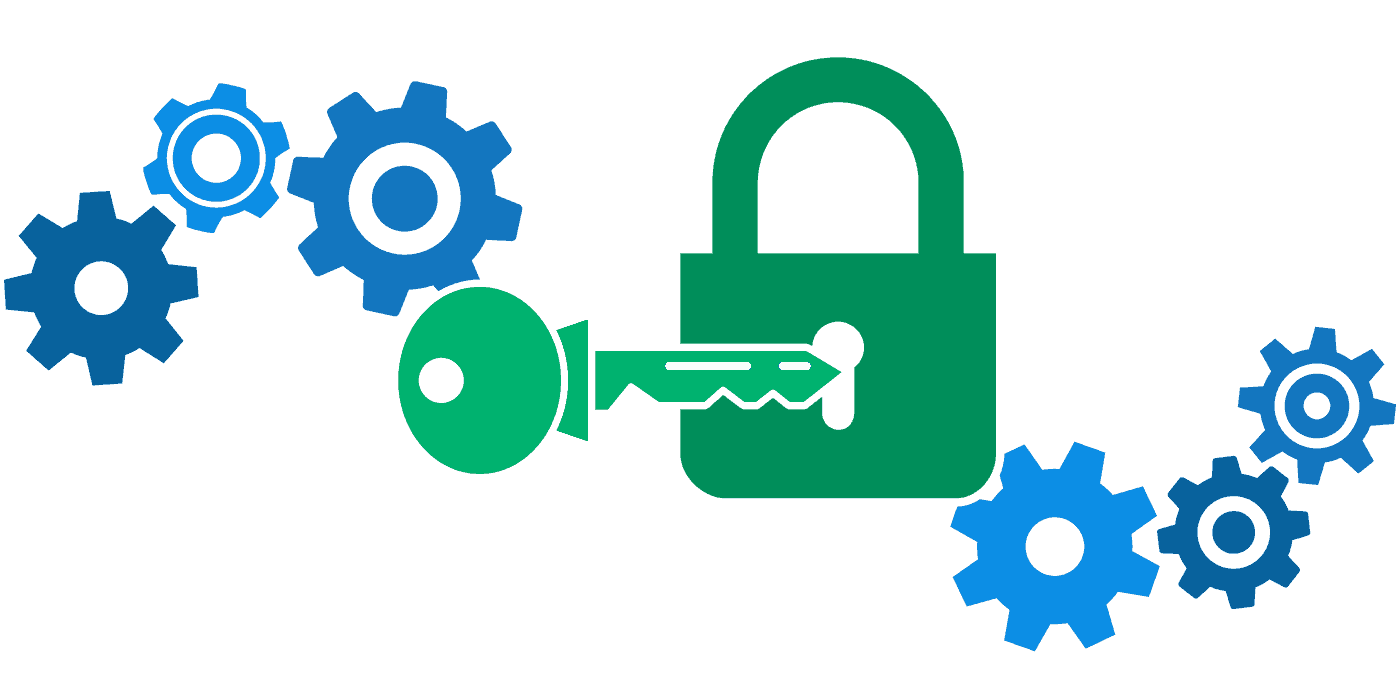
So, if you really want to protect your private data, you should instead look for apps that use industry grade encryption algorithms (such as AES 256) to encrypt data on your Android device. Here, we’ve picked a few such apps that fulfil this requirement.
Additional write permissions required: Due to Android’s restrictions, certain third party apps don’t provide the option to delete files from external storage (SD Card). So, if you import files from the SD card into the vault apps, you may have to manually delete them from their original locations on your device.
To open a particular vault folder, you need to provide its specific password. Each of the files within the vault can be opened from within the app. It will first decrypt your file, and then provides a suitable app (from your installed ones) to open the file in.
If you want to transfer your Secrecy vaults to a different Android device, just copy the SecrecyFiles directory from the Internal Storage of your previous device and paste it in the same location on your new device. The vaults will still contain the same password.
Additional security options include the Stealth Mode, which allow you to completely hide the app icon from the App Drawer, enabling you to access Secrecy app by dialing a specific number from the Phone app. You can even change the default location of the vault to a custom one.
Being an open source app, Secrecy is available as a free download on the Google Play Store, but the developer is open to donations. And the Stealth Mode feature of the app is exclusively available only to those who donate.

SecureSafe – Highly Secure Online Storage Vault

SecureSafe is an award winning Android app for secure online file storage and password management. It provides strong AES 256 driven double encryptiontriple data storage, and zero knowledge architecture, ensuring one of the highest levels of security & privacy in the cloud.
With SecureSafe, you can store Passwords, PIN, Credit/Debit Cards, Banking Information, Images, Videos, Contacts and more, organized in different dedicated folders. All the data that is imported into the app is encrypted and uploaded to the SecureSafe servers, in such a way that no one except the user has any access to it. Being zero knowledge, the files are encrypted locally with your unique private key, and then uploaded to the server.
Even if an unauthorized person gets access to your encrypted data in the cloud, they can’t retrieve the original data from it, without knowing your associated private key. Additionally, your files are uploaded to the cloud via HTTPS, and are stored in high security Swiss data centres, one of which is located in a former military bunker!
Besides storing all sorts of data, SecureSafe features Data Inheritance, which ensures that business partners or family members can access the secure data on emergency. This needs to be activated via a web app. Refer this webpage for more information about setting up and using this feature.
The app lets you open PDF files in an encapsulated environment within the app, so that there’s no trace left of it on the device. It also lets you capture and encrypt photos and videos directly within the app. And with the SecureSend feature, you can encrypt and send files up to 2 GB in size to any recipient of your choice. The recipient doesn’t require the SecureSafe app to download and access the file.
One of the only downsides of this app, is that it majorly works online. Even though the app does have an Offline Login mode, it’s only meant to view the files that are encrypted on your current device. Any new password, file or other data that you need to encrypt, requires an Internet connection.
Your SecureSafe files are accessible across multiple devices, using the SecureSafe apps, which are available for Windows, macOS, iOS, Android, and Web platforms.
In the free mode, SecureSafe allows you to safely store up to 50 unique passwords, along with up to 100 MB of personal file storage. The PRO user can avail an unlimited number of password storage, and unlock up to 1 GB of personal data storage. The Silver and Gold plans can further increase the personal storage limit to 20 GB and 100 GB respectively. Check out the various available plans for SecureSafe, in this webpage. Also, there are separate plans for Business users.

Andrognito – Hide & Encrypt Private Files Easily in Android

Andrognito is a vault app that secures your private photos, videos and files using military-grade AES 256 encryption, and supports quick data encryption/decryption techniques. Thus, it strikes a good balance between security and convenience of use. The app can be protected by a PIN, passcode, pattern, or even fingerprint lock on supported Android devices. The access lock has to be configured during the initial set up.
During the initial setup, the app will ask you to sign up with your email address. You have to configure a security option to authenticate yourself. Within the app, users have the option to import photos, videos and other files into the Vault.
Once imported, the files can be accessed only from within the app. They are stored on your device using AES 256, which means intruders cannot retrieve data from encrypted files unless they have access to your private keys.
The app looks impressive in the way it looks (with Material Design and all that). But we noticed a particularly strange thing about the app. Whenever you reinstall the app on a different device, and use the same email to sign in to the app, it retrieves all the file names (along with empty placeholders) of all the files that you previously stored during your previous installation.
This means that the app does keep some sort of record of the files you import and encrypt in Andrognito. Although, the app developer doesn’t mention this anywhere. This poses a potential security risk as to what personal data is actually stored in Andrognito servers. And that’s why we are mentioning it at the end, even though initially it was one of our top picks in terms of security, usability and experience.
Encrypt and lock (hide) photos, videos and files on Android

Thursday, 30 November 2017

How To Track shipment from multiple couriers with single app

Track shipment from multiple couriers with single app


When you are expecting a delivery from any courier or postal service, one of the biggest challenges you probably face is to properly track your shipment. Some courier services do provide you with a tracking ID, but generally, you need to manually check the status of your shipment. Unless the service has ties with a major e-commerce company, it is usually unlikely that you’ll find a dedicated tracking service that automatically keeps you updated with shipment status changes. Some services do provide mobile apps to give you push notifications for shipment status. But then again, if you usually receive frequent packages from multiple services, you’ll need to install individual apps for each of them. Also, most courier services don’t even have mobile apps.
What if a single app could provide integrated push notifications for all of your shipment status updates across multiple courier services from around the world. In fact, there are a few apps that already allow you to do so. In this article, we’ll explore some of these apps.

Aftership

Aftership supports more than 235 postal and courier services from around the world and lets you track the status of your packages being handled by any of the supported services. Once you provide a valid tracking number for your shipment, it will automatically detect the courier name and fetch other details such as item to ship, shipping history, current status of shipment, etc. You can manually select the courier service name in case it is wrongly detected. Tracking ID can also be scanned using a built-in barcode scanner. It also gives push notification every time the status of shipment changes – Info Received, In Transit, Out for Delivery, Delivered, Failed Attempt, and any other delivery alerts from the courier service. In addition, the app also saves all your tracked shipments in case you want to refer to it at a later time. Supported couriers include FedEx, UPS Mail, USPS, DHL, Blue Dart, DTDC and many more popular services worldwide. Aftership is freely available on the App Store (iOS) and Android (Google Play).

Parcel

Parcel is another package shipment tracking app similar to Aftership which supports more than 240 courier and postal delivery services worldwide, including services like Royal Mail, HDNL, UK Mail, Yodel, Deutsche Post, TNT, UPS, USPS, FedEx, etc. Tracking data is collected in the server and pushed to the app, so that you get all your shipment notifications directly on your device. Like Aftership, it can automatically detect the courier name from the tracking number and can provide push notifications for changes in shipment status. Additionally, the delivery of package can also be viewed on a map. Parcel is available for free on the Mac and iOS App Stores, but this version only allows you to track up to three simultaneous shipments and does not provide push notifications. To unlock these features, you need to upgrade to the Pro version.

Slice

Slice is a great app for keeping track of all your online purchases. Though its shipment tracking capabilities are limited, with support for only a limited number of courier and delivery services, it’s actually more useful as a one stop destination for managing everything you buy and sell on the Internet. To use Slice, you need to register for an account and link your email address to it. Once linked, Slice scans your email for all your online purchase receipts and organizes them in various views, giving you detailed stats on your overall purchase trends. You can also track shipments from a limited number of popular delivery services including DHL, FedEx, UPS, USPS, Prestige, OnTrac, etc. Slice is available as a web based app, and is also available for iPhone, iPad and Android devices.
Track shipment status automatically from iPhone, Android


Wednesday, 29 November 2017

How To Play NES, SNES games on iOS and Android with NES Controller

Play NES, SNES games on iOS and Android with NES Controller


For many people who grew up in the late 80’s and 90’s, classic NES and SNES games will always hold a special place within us. So, even though console gaming nowadays includes detailed, realistic graphics, we still yearn to play that Mario game, or get excited whenever we hear a popular 8-bit game tune. We can’t blame ourselves; there’s a lot of nostalgia involved here!
With the help of emulators available for both iOS and Android platforms, developers have made it possible to bring many of our favorite classics to our smartphones and tablets. Still, for dedicated gamers who want to press actual buttons instead of virtual ones on the screen, game controllers can optionally be paired up with your Android and iOS devices to provide a near-complete retro gaming experience.
In this article, we’ll let you know how to setup your iPhone, iPad or Android device to play retro classic games from NES, SNES, Atari, GameBoy, etc.

How to install retro games on iOS and Android

The game you’re trying to run on your smartphone or tablet may be available in two forms:
  1. It might be an iOS/Android port of a classic NES, SNES game, available on the App Store or Google Play.
  2. It might be available as a raw game file; for example, with a .nes or .snes extension.
In the first case, the game may directly be downloaded from the App Store or Google Play Store and you can start playing by simply launching the game from the Home Screen or App Drawer (in case of Android).
In the second, the game file may need to be separately downloaded, along with a suitable Emulator app.
Most retro classic emulators won’t be directly available on the App Store, but may be installed from external sources. Many of these are available on third party app stores like BuildStore, which do not require jailbreak to install them. For Android devices, many SNES, NES, GameBoy, etc., emulators are available on Google Play Store, but you may also download them from the Internet.
Some of the popular Game Emulators available for iOS and Android are given below:

iOS Retro Game Emulators

Here are a few iOS Retro game emulators that you can try:
GBA4iOS 2.1: GBA4iOS is a Game Boy Advance Emulator for iOS devices, with built-in AirPlay support, as well as support for MFi certified game controllers. This provides you the big screen gaming experience, while also being suitable for people who prefer to use controllers. One can download games and manage them within the emulator app, so there’s no need of file management.
NDS4iOS: NDS4iOS is a Nintendo DS emulator for iOS devices, which is a port of the multi-platform DeSmuME 0.9.10 for iOS. Like GBA4iOS, it also features built in support for MFi controllers and AirPlay. Game files need to be copied into the emulator’s in-app storage, in order for them to be detected.
MD.emu: MD.emu is a full-featured Sega Genesis, Mega Drive emulator for iOS. The app includes iTunes file sharing option to copy game files to its in-app storage.
HappyChick 1.51: HappyChick is one of the most comprehensive game emulators, supporting a wide range of arcade (MAME/FBA) and retro game formats, such as GBA, GBC, MD, SFC (SNES), FC (NES), PSP, N64, NDS, PS1 and DC. This also requires you to copy supported games to the in-app storage in order to play them.

Android Retro Game Emulators

Below are some Android Retro game emulators that are available for download from Google Play Store.
Nostalgia NES: Nostalgia is a great NES emulator for Android, which is based on the latest version of FCEUX. It does not contain any built-in games, but supports importing games via .nes or .zip files stored on your Android device. The emulator features some unique features, such as Multiplayer WiFi controller mode (with support for up to 4 players), Rewind Mode and more.
Snes9x EX+: Snes9x EX+ is an open source SNES emulator based on Snes9x 1.53. It includes a public domain game called Bio Worm. However, users can import other games from the Internal Storage or SD Card. Supported file formats include .smc and .sfc; zipped formats such as .zip,.rar and .7z are also supported.
MegaN64: MegaN64 is a Nintendo 64 emulator for Android, which is a modified version of the open source Mupen64+ project. As with other emulators on the list, MegaN64 does not include any game files. Games stored on the Internal Storage or SD card may be played using the emulator.
Once you have installed a suitable emulator on iOS and Android, you can load any supported game and play using the usually customizable, virtual, on screen controls provided in the emulator interface. For a better experience, you may also opt for a suitable game controller that supports your device and the emulator. Most of the emulators mentioned above are compatible with external gaming controllers, which may be wirelessly connected to your iPhone, iPad or Android device via Bluetooth.

Wireless NES controller for iOS and Android

Below are some decent gaming controllers that are compatible with most of the iOS and Android devices.

8Bitdo Game Controllers

8Bitdo is a popular gamepad designing company established in 2013 that builds retro-style game controllers for modern devices, including Mac, PC and iOS / Android devices. It has a number of Bluetooth game controllers in its lineup, including a new Kickstarter entry named the AP40. The AP40 is a Bluetooth gaming controller inspired from Apple’s original multi-colored logo. It is compatible with Android, iOS, Mac, PC and more.
Other significant releases from 8Bitdo include NES30SNES30NES30 Pro8Bitdo Zero, etc. All iOS/Android supported 8Bitdo controllers are MFi certified and are compatible with the latest iOS devices.

SteelSeries Stratus (for iOS)

The Stratus mobile gaming controller is a premium wireless controller designed for the iPhone, iPad and iPod Touch, built for superior gaming experience. It is compatible with all iOS apps with external controller support.

SteelSeries Stratus XL (for Android)

The Stratus XL is a powerful wireless gaming controller for Windows and Android devices with built-in Steam support. The Bluetooth connection is reliable with almost zero lag — just as responsive as other major game controllers.
Some other Android and iOS supported Gaming controllers include ICade 8-Bitty Wireless Retro Game Controller, Gametel Portable Wireless Retro Game Controller for smartphones, and BEBONCOOL Wireless Bluetooth Game Controller for Smartphones and Tablets.
Play NES, SNES games on iOS and Android with NES Controller

How To Play Same Song on Multiple Phones Simultaneously

Play Same Song on Multiple Phones Simultaneously


Let’s say you’re with your friends and want to groove to a particular song. Unfortunately, no one has got a speaker; though, each of you has got a smartphone. Now, if you can play the same song on all the smartphones, the sound will be amplified, and all of you will have a good time rocking to your favorite music.
Seems like a brilliant idea. Only, it’s not easy to play a song in sync on multiple devices. The song you want to play might not be available on your friend’s device. Even if it is, hitting the play button at the same time on multiple devices is hardly possible. The more the number of devices, the more the possibility of playing out of sync. In the end, all you hear is some out of rhythm “noise”, which kinda ruins the party mood.
Well, you no longer need to be worried about playing songs in sync on multiple devices. AmpMe is here to help. AmpMe is a mobile app available for iOS and Android that syncs audio/video playback on an unlimited number of devices, turning them into one big speaker system.

How does AmpMe work?

The idea of playing the same music in sync on multiple devices sure sounds exciting. But how does AmpMe pull it off?
First off, AmpMe uses your device’s location to detect other nearby devices. If all the devices are connected to the same WiFi Network, the app uses that to stream audio across all the devices; otherwise, it uses the devices’ Internet connection.
Note: AmpMe may consume cellular data, if all the participating devices are not connected to the same WiFi network.

Play same music on multiple devices

The below steps will guide you to play audio simultaneously on multiple devices:
  1. Download and Install AmpMe from the App Store or Google Play Store.
  2. Open the app and click on the appropriate option under “Start a new party” (Spotify, YouTube, Music Library, SoundCloud) to host a party.
  3. Tell your friends to open the AmpMe app and join your party. Alternatively, you can also join other parties hosted by your friends nearby.
  4. Wait for the devices to sync up and start playing.
That’s it! In a few seconds, all the connected devices will start streaming the song in sync.
Note: In case one or more of the devices are not in sync, you can tap on the Sync button and manually adjust the offset to match the others. You need to wait a second or two after adjusting the offset, for the changes to take effect.
AmpMe also works with Bluetooth speakers. If you are the host, you can connect your device to a Bluetooth speaker to play music through it, along with other devices synced via AmpMe. It’s a really handy app to take your friendly get-together to the next level.
Play Same Music in Sync on Multiple iPhone, iPad And Android Devices

Send WhatsApp message without saving receiver’s phone number

Send WhatsApp message without saving receiver’s phone number


For most part of it, WhatsApp may have been able to replace SMS on your phone. It’s lightweight, instant and free, hence taking a significant advantage over conventional SMS. And with over a billion users a day, the app is likely used by everyone in your social circle.
Send WhatsApp message without adding contact
But there’s one small feature that WhatsApp lacks, which has been one of the core features of conventional SMS, that is, sending messages to someone who’s not on your contact list. If you wish to send a WhatsApp message to someone, they should be already present in your contacts. If not present, you have to create the contact first before you can send them a WhatsApp message.
Now, that’s fine, if the particular person is a regular contact. But sometimes, you might just want to send a message to a person for one-time purpose, and may not prefer to add their contact due to the temporary nature of the communication.
Moreover, you might prefer to just chat with a person without giving away your personal details (Profile Picture, Status, etc.). And a specific privacy setting in the app, allows you to hide such information from people who are not on your contacts list.
But unfortunately, WhatsApp does not allow you to send messages without saving the phone number. In this article, we’ll explore a few workarounds and solutions to send WhatsApp messages to a phone number without adding it to your contacts.

WhatsApp Direct (iOS, Android, Windows Phone)

WhatsApp Direct is a simple web app that allows you to send WhatsApp messages, directly to a phone number, without having to create a contact first. WhatsApp Direct is a multi-platform app that works on the iPhone, Android and Windows Phone devices.
The web app interface is quite simple and self explanatory. The following steps will guide you to send a WhatsApp message via WhatsApp Direct:
  1. Open WhatsApp Direct on your iPhone, Android or Windows Phone device.
  2. Select the receiver’s country code.
  3. Next, enter the receiver’s phone number (without the country code), and the message (optional) that you want to send, in the respective spaces provided.
  4. Hit the Send button.
The app will now redirect you to WhatsApp (Click OK if it asks for your permission), with a new chat open corresponding to the entered phone number, and the entered message ready to be sent. To send the message to the phone number, just tap on the Send button on the chat screen.
If you do not have WhatsApp installed, it will prompt you to install it from the App Store or Google Play.
Note: Ensure that the phone number that you’re entering is already registered to WhatsApp, otherwise the message won’t reach the receiver, even though it is sent successfully to WhatsApp servers.

Install WhatsApp Direct

On iPhone and Android, you can install WhatsApp Direct to the Home Screen by using the Add to Home Screen option. This way, you can launch WhatsApp Direct just like any other app on your device. To add WhatsApp Direct as a web app on iPhone or Android, do the following:
On iPhone
  1. Launch WhatsApp Direct using Mobile Safari.
  2. Tap on the Share icon at the bottom of the screen.
  3. From the Share Menu, select Add to Home Screen and then tap on Add in the top right corner.
On Android
  1. Launch WhatsApp Direct using Chrome browser.
  2. Tap on the Menu button (hamburger icon) from the top right corner of the screen.
  3. Scroll down and tap on Add to Home Screen and then tap on Add in the pop up.
WhatsApp will now behave as an independent app that can be launched directly from the Home Screen of your iPhone or Android smartphone.

How To Encrypt and Hide Photos, Videos and Files on Android

How To Encrypt and Hide Photos, Videos and Files on Android Would you be willing to let another person browse your photo or video gal...